Loading... Please wait...
Adding Pictures to Products
Posted by Microtrade Australia on 15th Sep 2022
Adding Pictures to Products
The sales screen has the ability to show both the name and image of the product for sale on the product button. To add images to the product button follow the directions below.
Place the image you wish to use if the product into the pics directory (see file locations section of this document.) You can use images downloaded from the web or images that you have on CD or that you have created yourself. For this example I will continue to use the Cappuccino product that we created in the adding a product section of this document.
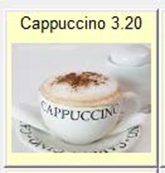
I have located and image of a cappuccino on the web (see below) and saved the image in the pics directory as cappuccino.jpg

Note: you can use any image that you choose, the system will accept any size image and reduce it so that it fits on the button. However each image that you use has be loaded into memory and if you use very large pictures or pictures that are large in file size these images will use available memory and may slow your computer down.
To add the image to the product you will need to access from the Manager button on the Main Control screen, then Products and Product Control. Search for the product you wish to located,
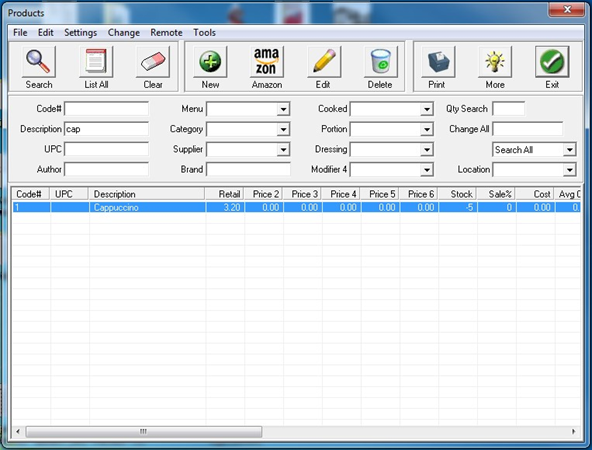
Highlight the product and then click the edit button. The following screen will be displayed.
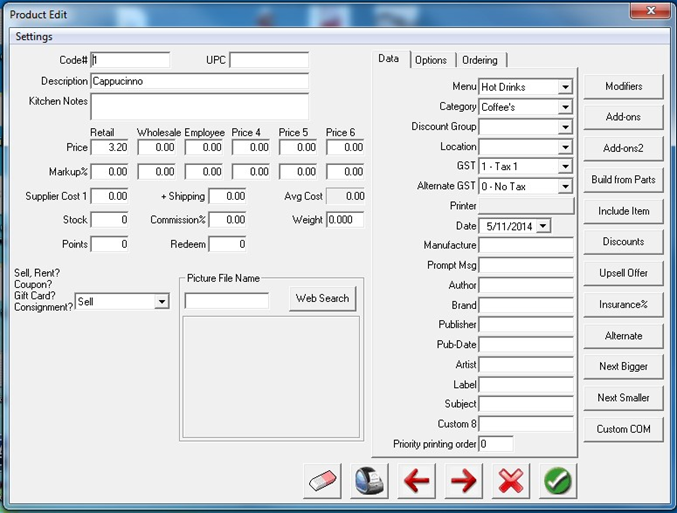
You can see in the lower center of the screen that there is an area to add a picture, if you know the name of the picture that you wish to use (and it already exists in the pics folder) you can just type the file name in the file name field and press enter.

If everything has gone ok then the picture should now be displayed on the area below the file name. If you didn’t get the file name exactly right or the picture doesn’t exist in the pics folder then nothing will happen.
If you do not know the name of the file you can click in the area where the picture is shown in the above image and the system will bring up a screen that allows you to locate the picture file in the images directory. Note: the window does not default the pics directory you will need to navigate to it. (See file locations section of this document if you not sure where it is)
You can also see the web search button next to where you can enter the filename of the image. (To use this button you need to have an active internet connection.) You can use this in 2 ways, A) you can leave the image name field blank and click on the Web Search button. The program will open your default web browser and take you to google images search page where you can search for an image you would like to use, or B) you can enter the something into the file name area I.E Cappuccino and then click the Web Search button, This will still take you to the Google images search page but it will already be showing images related to the search term “Cappuccino”.
Once you have a picture on the product as shown in the above image you need to click the tick box to save the file. Your image will now appear on the product button on the sales screen. As you can see below.