 Loading... Please wait...
Adding “Add-Ons” to Products.
Posted by Microtrade Australia on 15th Sep 2022
Adding “Add-Ons” to Products.
Add-ons are used to change a product so that it caters more accurately to your needs. Add-ons are multiple choice and multiple option meaning you can select more than one option per product. I.E in a coffee order you may wish to choose Extra Shot, Vanilla Flavor, and Sugar quantity. This would be done via add-ons. Simply put an add-on is a product that you add to another product.
The method of creating an item so that it can be used as an add-on is almost the same as creating a normal product, it varies only in that it should not have a department/menu or category added to the product. (Note: that if you attempt to save a product without a department/menu or category the system will issue a warning that you have omitted this information. Simply say YES on the warning message.)
When you are creating your products to be used as Add-ons you can include a price to the add-on and this will be added to the cost of the product if the add-on is selected. I.E you can create a product called Extra Shot to add an additional shot of coffee, you could price the Extra Shot product at $1.00 and if the product is chosen during the order of a long black the price would increase from the standard long black pricing of $3.20 to $4.20. If the add-on is to be a free add-on then the price would be left at $0.00.
You will also need to remember to tell the system which printer the add-on will be printed at. I.E if a coffee order prints at the Barista printer you will need to set the add-ons relating to coffee orders to print to the same printer.
Once you have created the add-ons that you require you will need to add them to the product that they will relate to. For this example I will use the Cappuccino product that I created earlier.
I will create 4 add-ons… 1 Sugar, 2 Sugars Caramel, Extra Shot,
Edit the product (in this example the product I will use is the Cappuccino I created earlier) and select “Add-ons” or “Add-ons 2” in the top right of the product screen as you did earlier for Modifiers.
A new screen will open
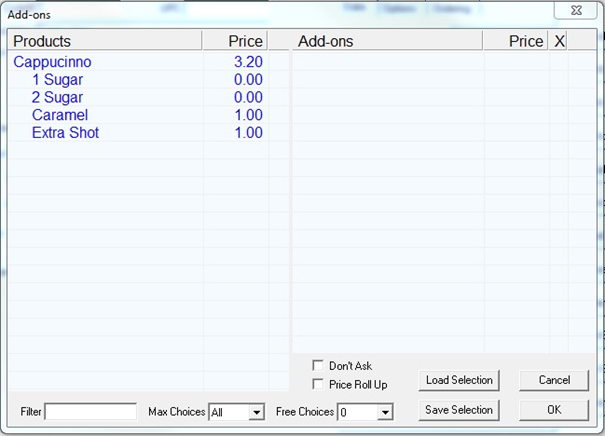
As you can see the all the products you have entered into the system show up on the left hand side of the add-on screen. (you can also see that the products I intend to use as add-ons seem to have the names of the product indented. I do this by adding 5 spaces before the description when entering the product, I find it much easier for people to differentiate where an order that has add-ons starts and stops on the receipts and kitchen printouts.)
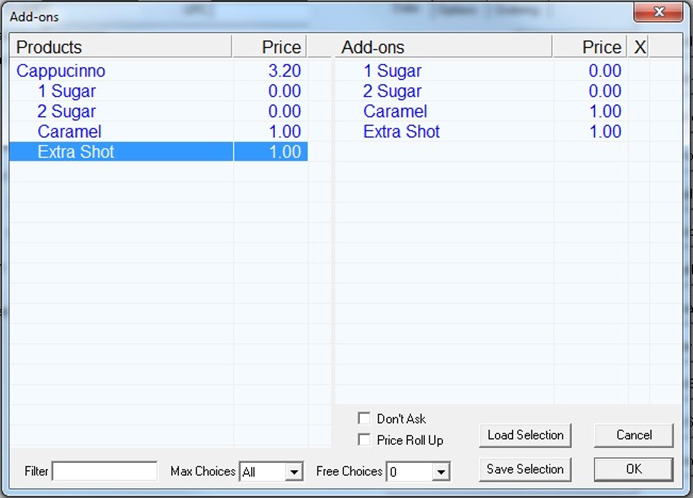
I will only be working with the 4 add-ons… 1 Sugar, 2 Sugars Caramel, Extra Shot since I am editing Cappuccino and adding the add-ons to it. To add an add-on to a product simply click the product on the left hand side of the screen that you wish to use and it will then appear on the right hand side of the screen as well.
Your add-ons are now ready to use. There are several other selections on this screen and I will list them below in order that I think you will use them.
Filter : Anything that you type into this field will limit the products shown on the left hand side of the screen. It is useful for locating products that you wish to use as an add-on.
Save Selection: You can store selections so that you don’t have repeat repetitive tasks. Load Selection: Load previously saved selections.
Max Choices: Limit the number of add-ons that can be selected with this product. Free Choices: If add-on’s have prices included (as caramel does in the above image) this is the number of add-on choices that can be made before these prices will affect the final sale price.
Don’t Ask: Disable the add-ons for this product.
Price Roll Up: Checking this option means that prices will not be individually displayed for each add-on, rather the main price will be the only indication that the price has changed.
Please also note that in the image above the products that are add-ons seem to be indented. I add half a dozen spaces prior to the description for add-on products. This makes them easier to identify by staff working with printer receipts and also makes the customer receipt look neater. This is only a personal preference and is up to you on if you follow this or not.
Exercise 3.
I have now added the add-ons and the new flow for the product Cappuccino can be seen in the images below.
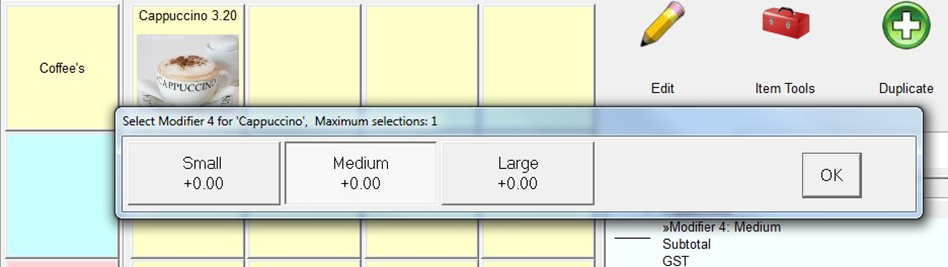
A medium Cappuccino is selected, Click OK
. 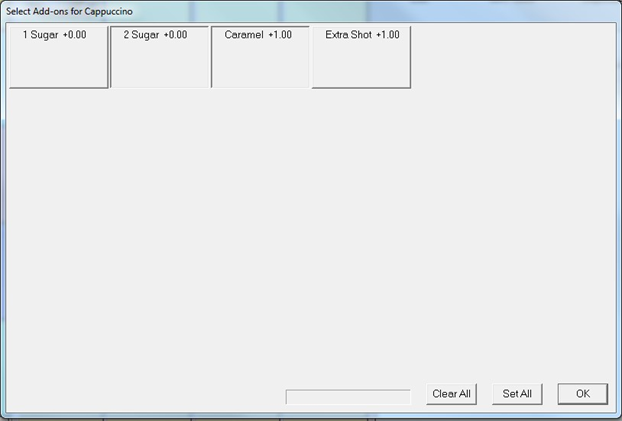
You can see in this image that I have selected 2 sugar and Caramel, if you select something in error then simply touch it again to deselect it.
Click ok
The system returns you to the sales screen if you do not have any add-ons entered in the Add-ons 2 screen. Here you can see the benefit of my suggestion earlier to indent the add-on products with spaces before the product description.
